

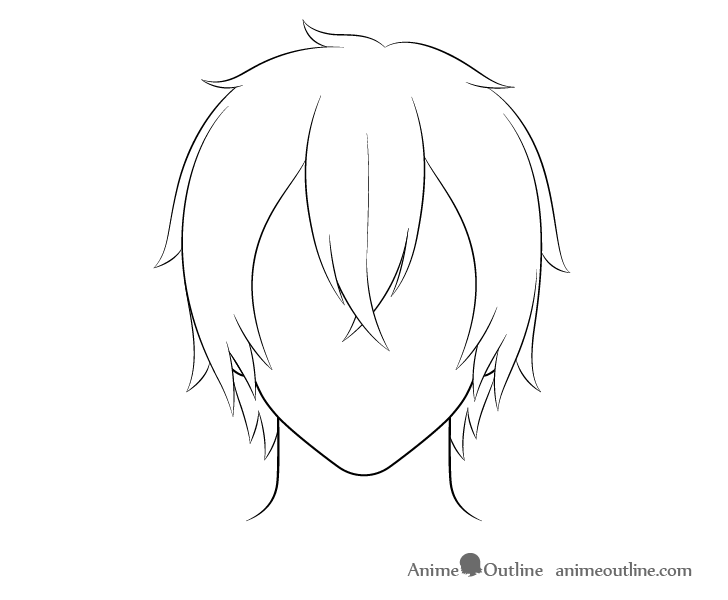
How To Cut Back Hair Anime Male
This tutorial shows how to depict male person anime and manga hair. It includes a total of nine hairstyles with step by step drawing examples and instruction for each.
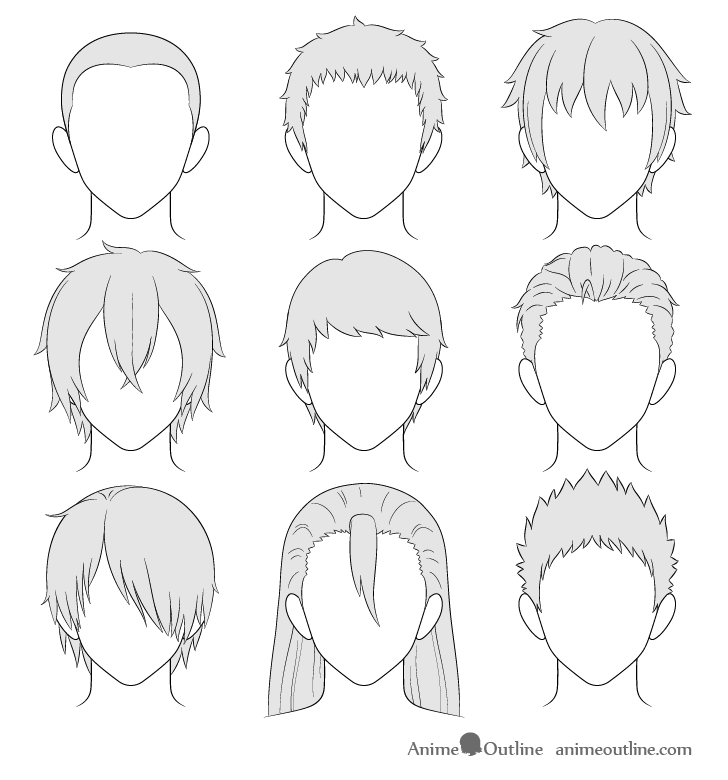
There are many variations of male person anime hairstyles. This tutorial focuses on the more common and generic styles that y'all are probable to come across in many shows and manga.
While drawing pilus can seem complicated a good style of managing the drawing process is by thinking of it as being split into various sections. These are the front end, sides and back/meridian.
To help avoid mistakes this tutorial uses a "see through" drawing approach. This means that if yous are going to be following along using pencil and paper it's important that you get-go brand light lines that yous can easily erase. You will demand to do so with parts of the drawing before you finish. You lot can darken the strokes later on you consummate the line drawing.
For more on expert drawing practices and common mistakes likewise see the tutorials beneath:
- Beginner Guide to Drawing Anime & Manga
- Common Mistakes When Cartoon Anime & Manga
- Beginner Guide to Picking Colors When Drawing Anime & Manga
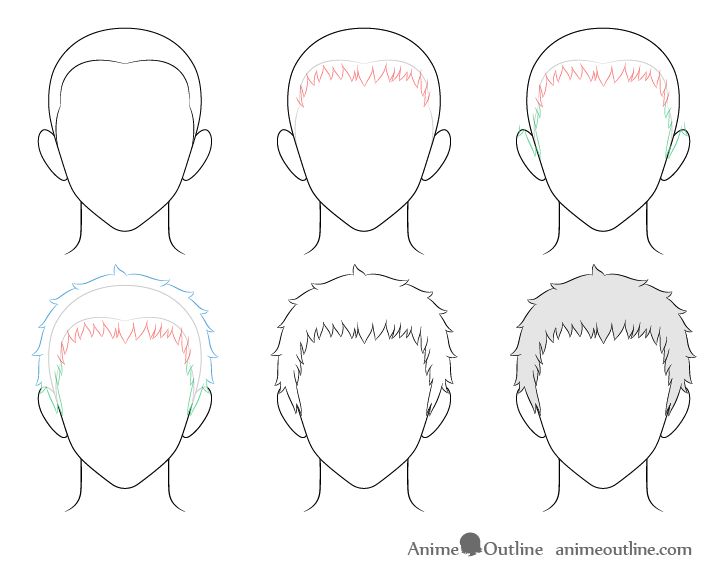
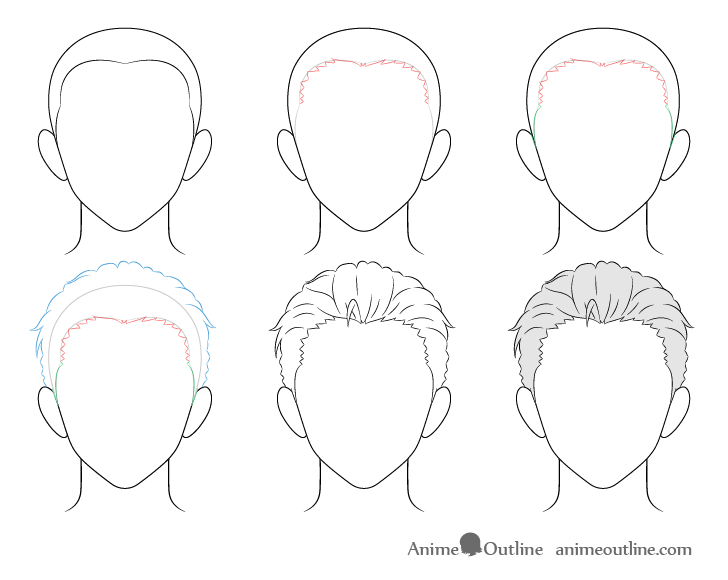
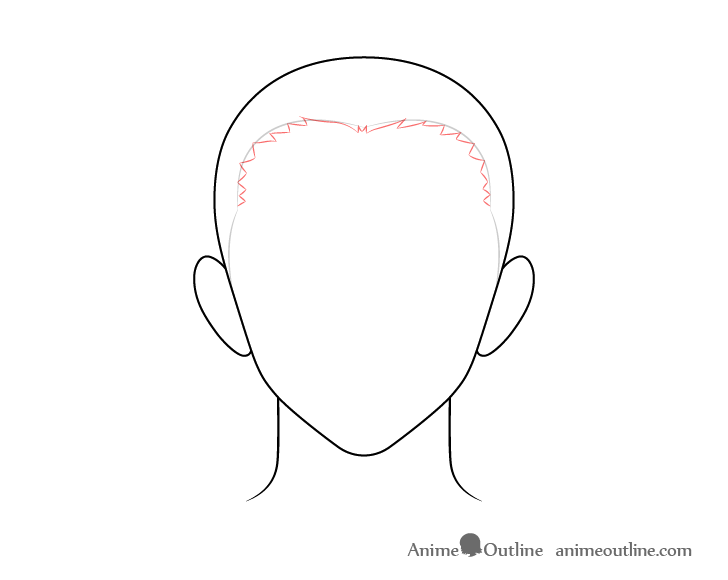
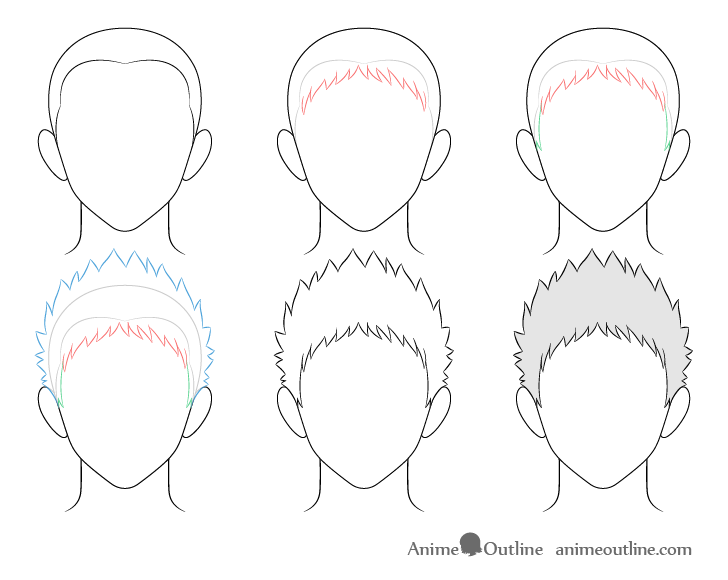
Drawing "Buzz Cut" Male Anime Hair
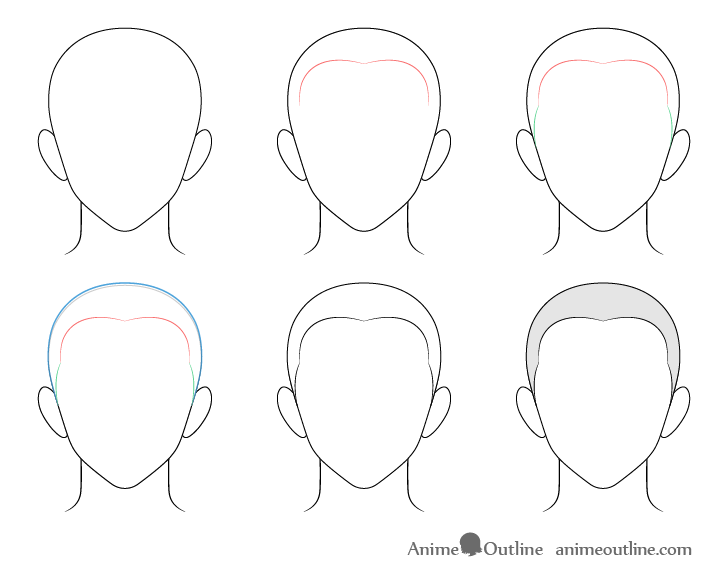
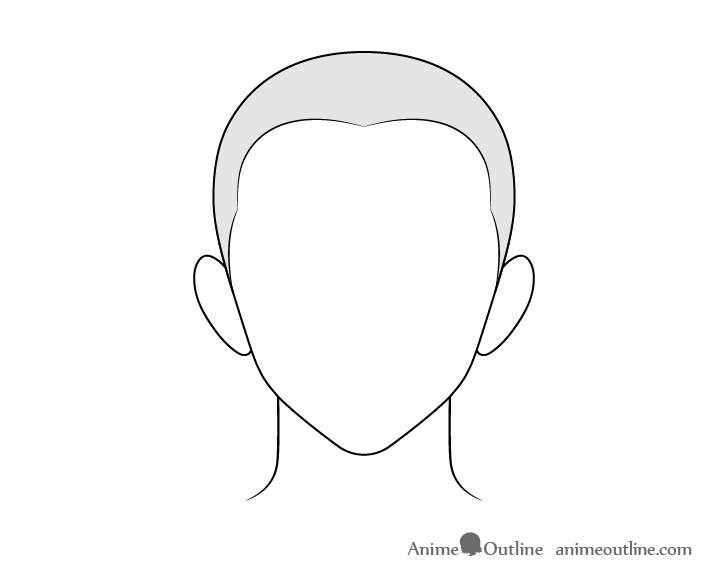
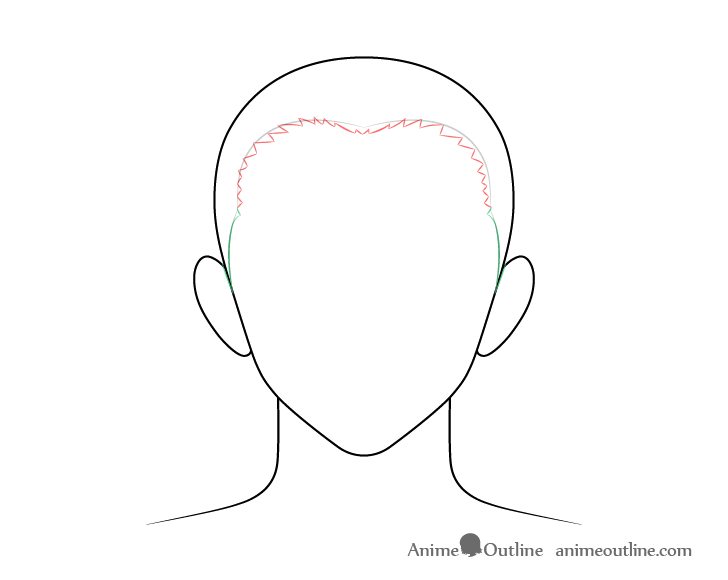
While this "hairstyle" is hardly any hair it's a good one to start with every bit it shows the hairline. This will be of import to cartoon the other styles.
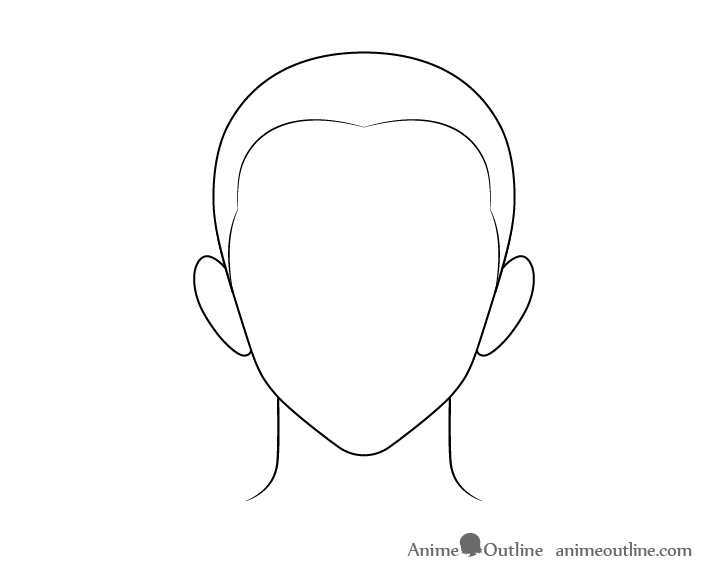
Before drawing the hair draw the head as shown in the step by step example in a higher place.
Step 1 – Describe the Front of the "Buzz Cut"

The front off the "fizz cut" volition be part of the hairline. Draw it with with just two big curves that create a bottom pointing tip slightly below the top of the head.
Please note that this is just a basic example as to how to depict the hairline. Information technology can vary in shape and position in both existent people and anime characters.
Footstep 2 – Draw the Sides of the "Buzz Cut"
Add the sides of the hairline with another pair of curves that join with the starting time set a good distance above the ears.
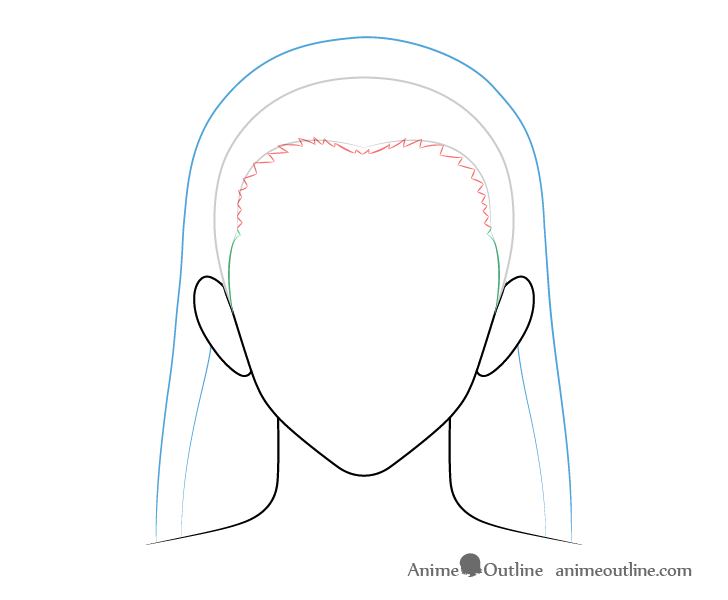
Step 3 – Depict the Top/Back of the "Buzz Cutting"
Finally depict the elevation/back part of the "buzz cut" pilus. Depending on how short you want this to be y'all tin fifty-fifty leave this stride out. If the pilus is almost completely shaved you can merely use the outline of the head to define information technology's peak.
In this instance the hair will be slightly longer so it volition be draw with just a little bit of volume. To do this draw the hair pretty much hugging the shape of the head starting from the top of the ears gradually moving away from it towards the superlative.
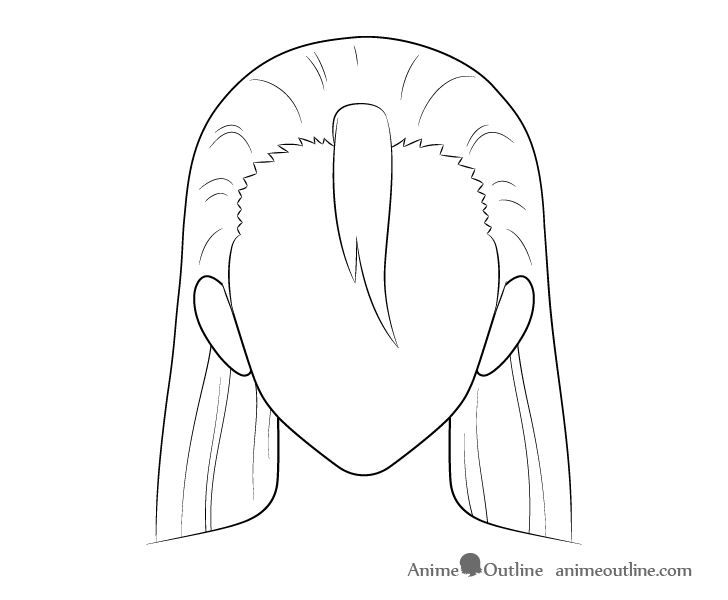
Footstep 4 – Terminate the Line Cartoon
To finish the line drawing first erase the top role of the head that should exist covered by the hair. Afterwards go over your drawing with a darker stroke.
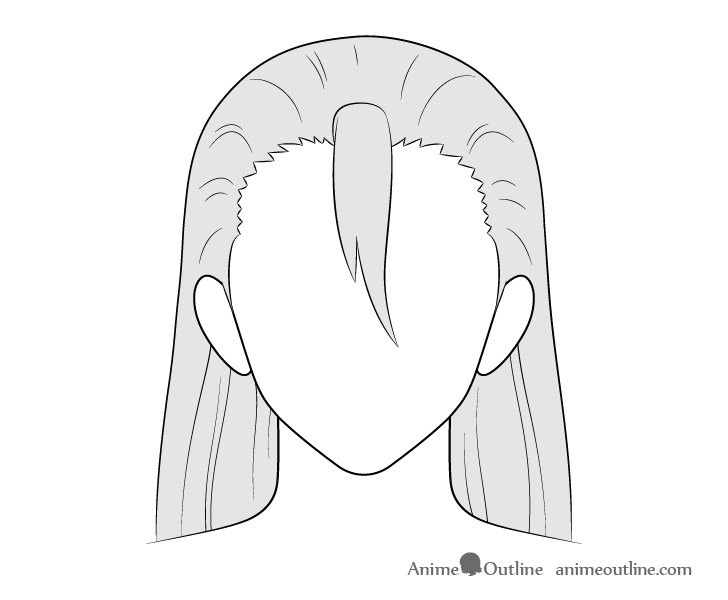
Pace 5 – Add Some Shading
You can also give the hair some bones fill/shading to make it a little more visible.
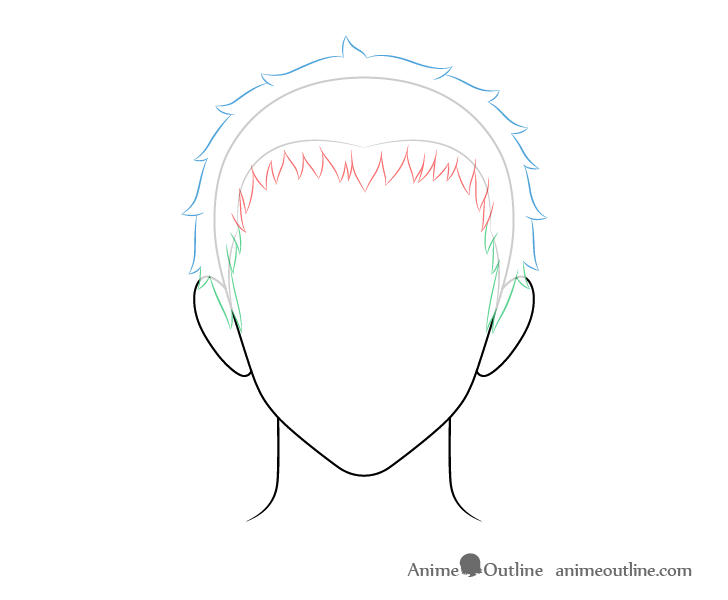
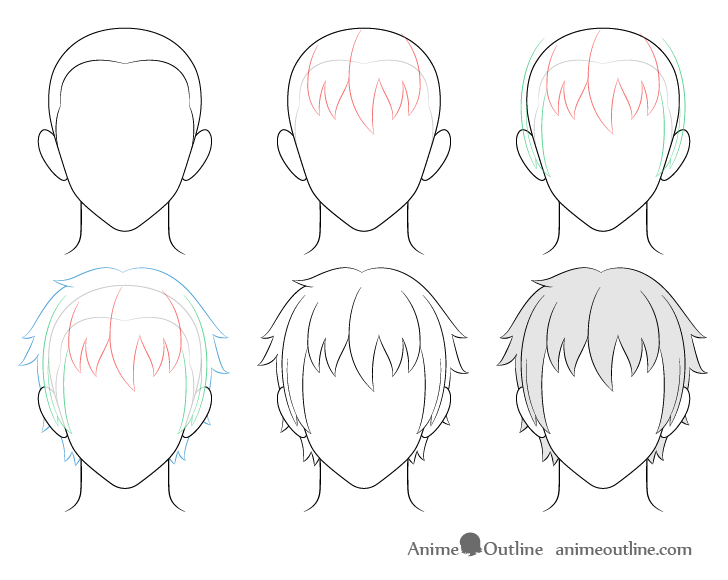
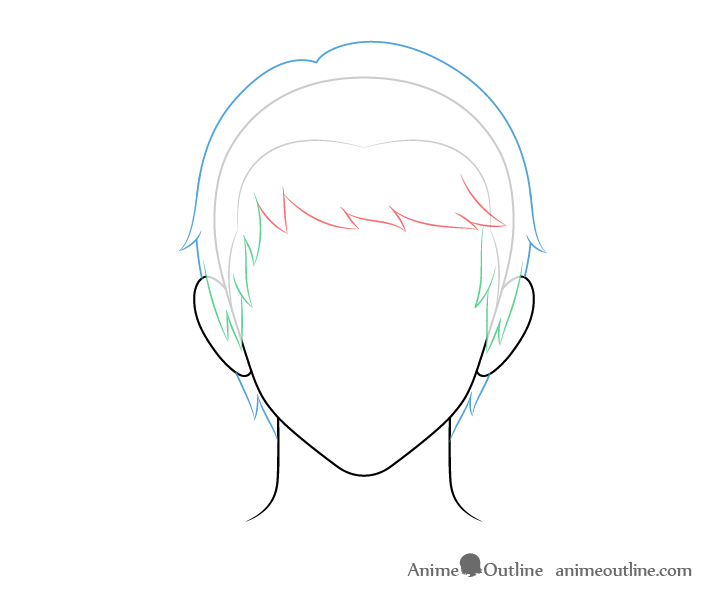
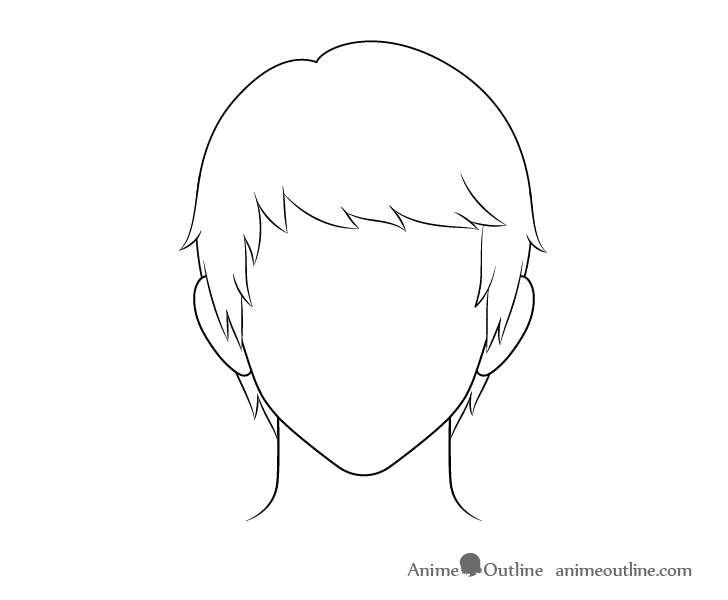
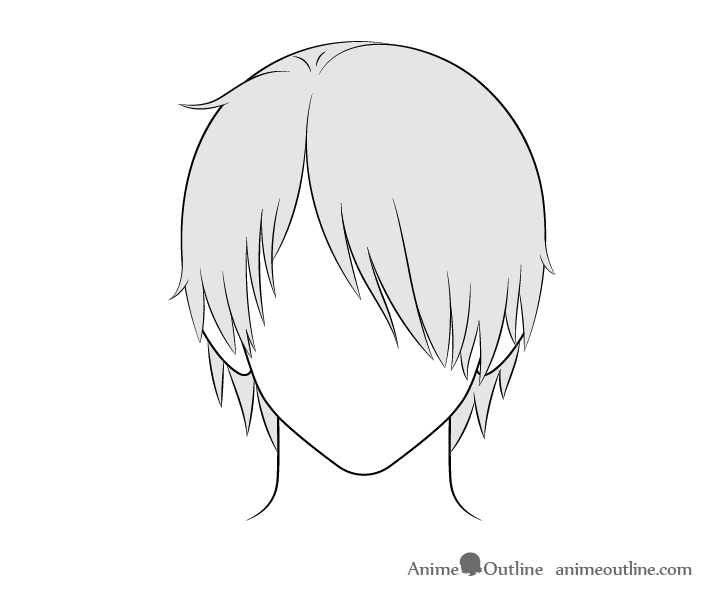
Drawing Curt Male Anime Hair
Brusque anime pilus will ordinarily exist drawn in smaller clumps compared to longer pilus. The reason for this is that short hairs tin can't reach far plenty to bring together into as a big a dodder.
Earlier drawing the hair draw the caput with an outline of the hairline (based on the first example of the tutorial).
Stride i- Draw the Front of the Short Hair
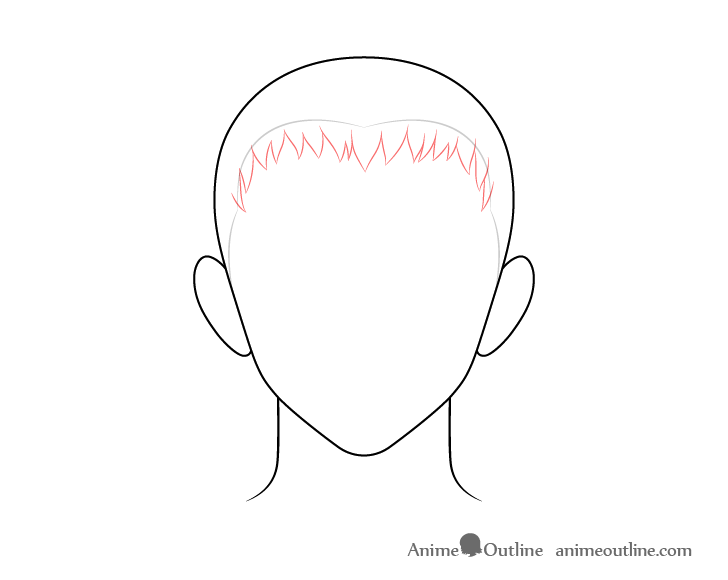
Draw the front department of the short hair with the base of it's clumps fairly close to the hairline.
Pace 2 – Depict the Sides of the Short Hair
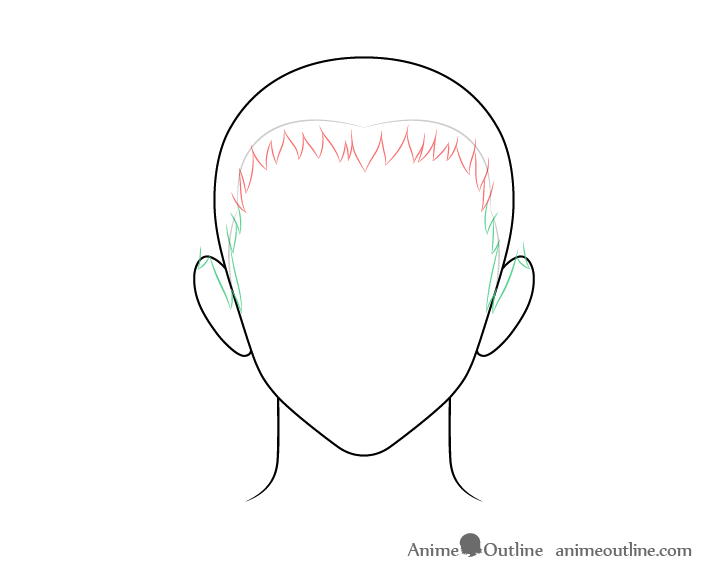
In a similar way to the "front hair" depict the side clumps close to the hair line likewise.
Step 3 – Draw the Superlative/Back of the Short Hair
Finally depict the back/elevation section of the hair somewhat "fanning out" around the caput. Besides exist sure to depict the clumps leaning somewhat downwards instead of projecting direct away from the caput like sun rays.
Pace 4 – Cease the Line Drawing
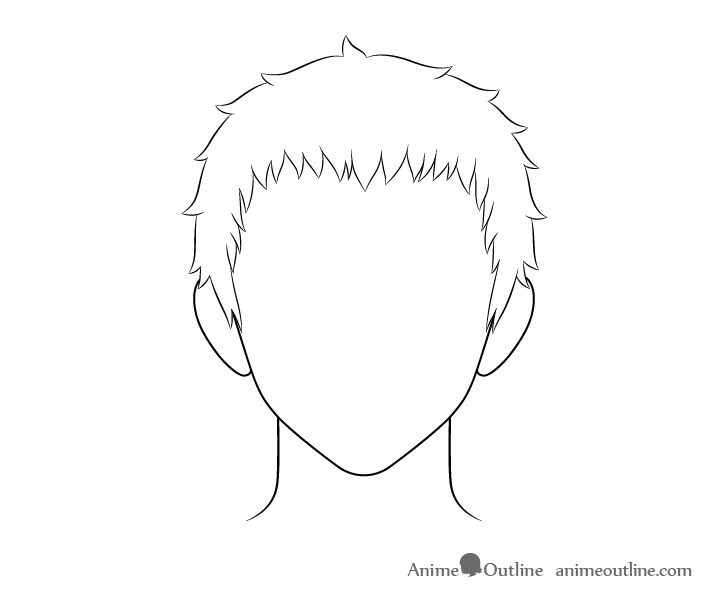
Once y'all end drawing the three parts of the hair erase the hairline and the sections of the head covered by them. You lot tin likewise become over your drawing with darker lines.
Footstep v – Add Some Shading
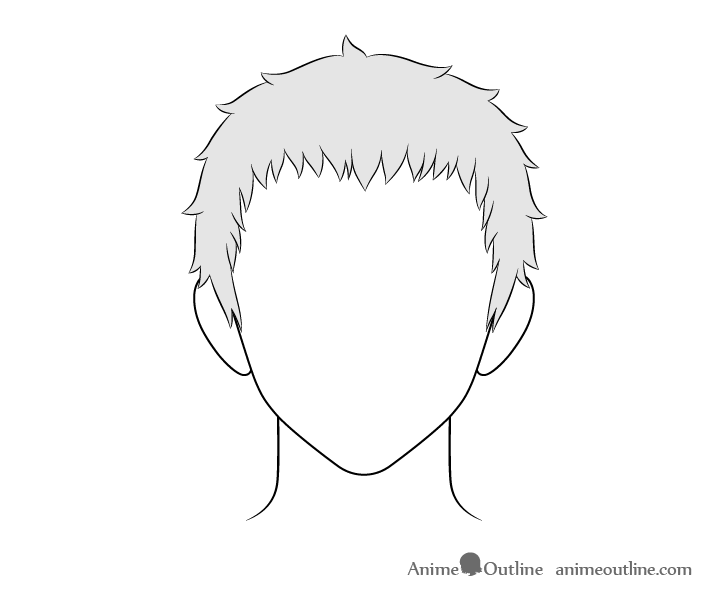
You lot can run across what the short hair will look like with some basic shading in the example above.
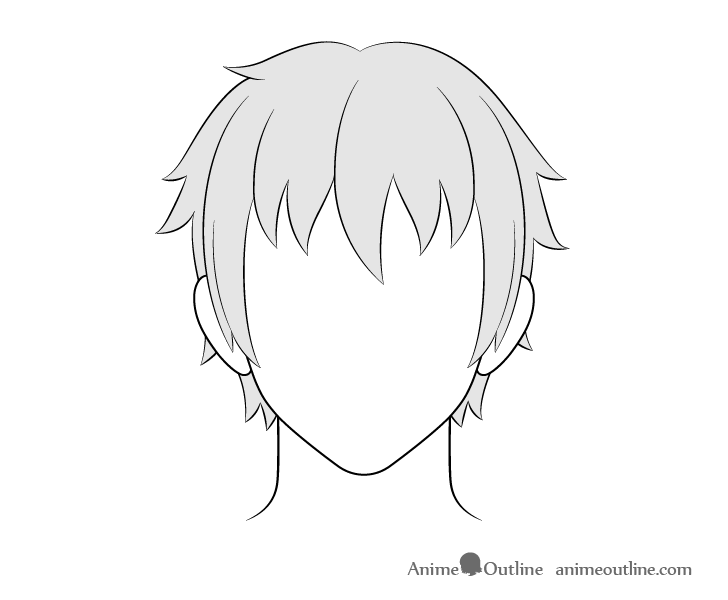
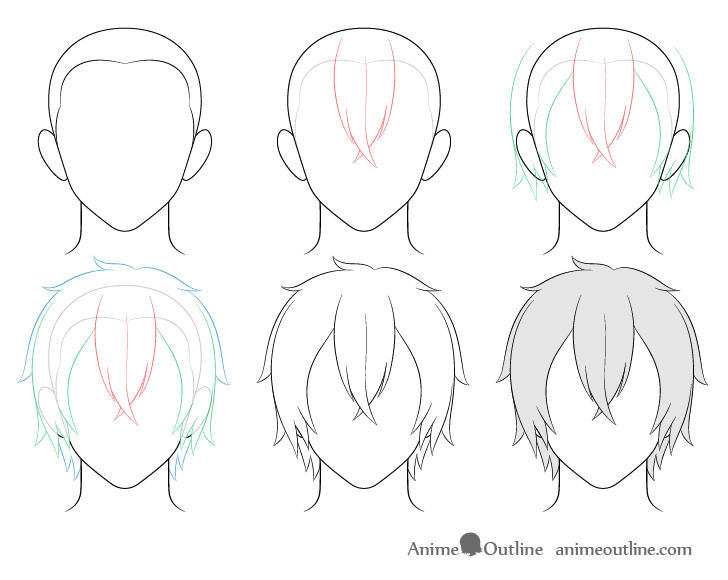
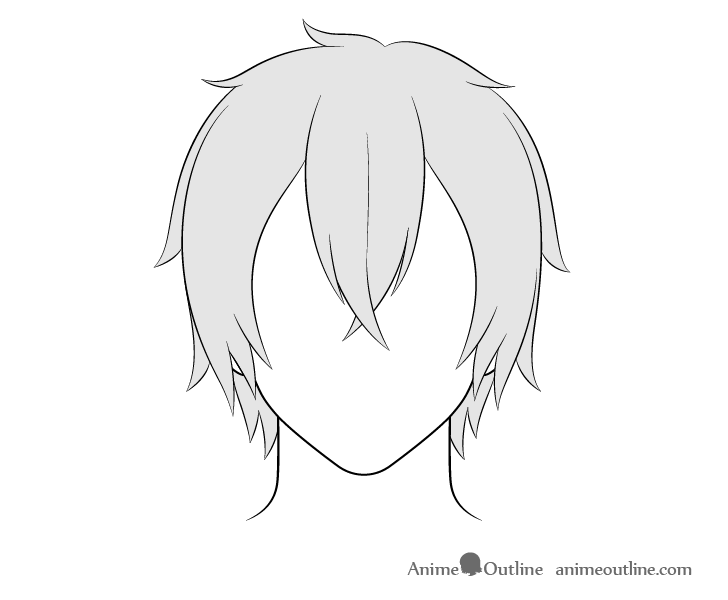
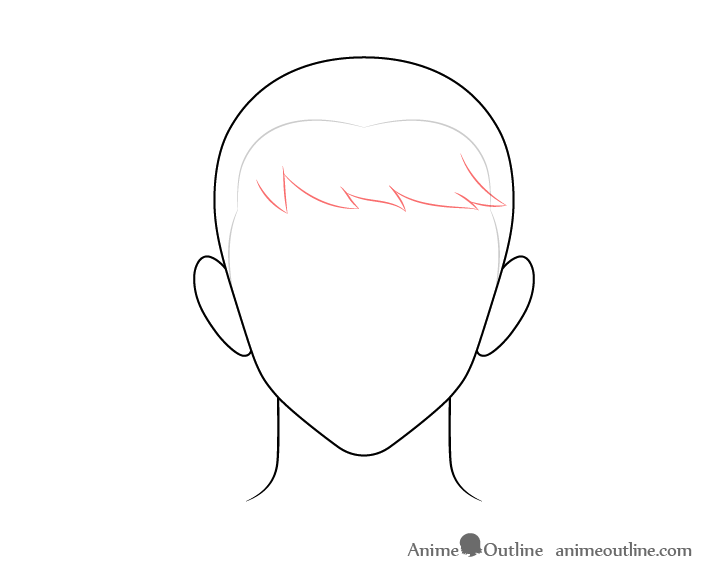
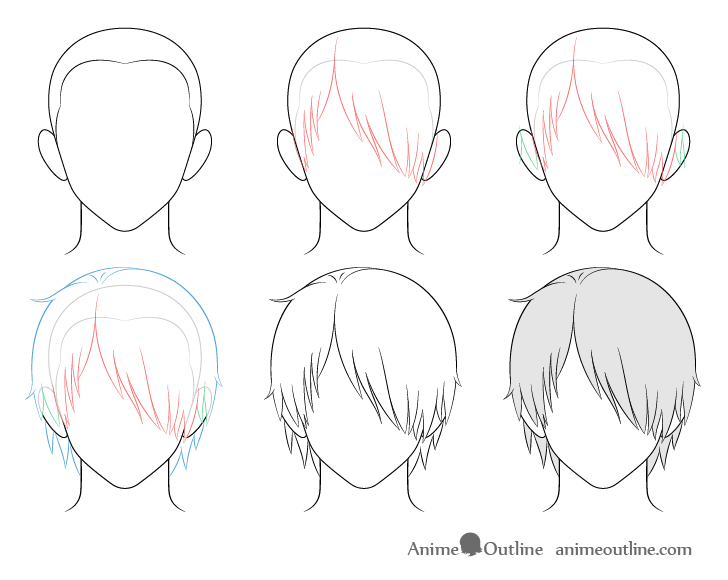
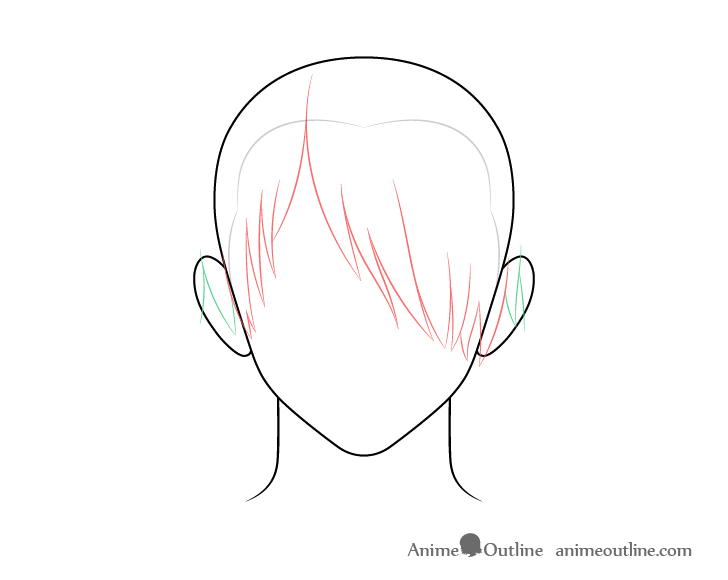
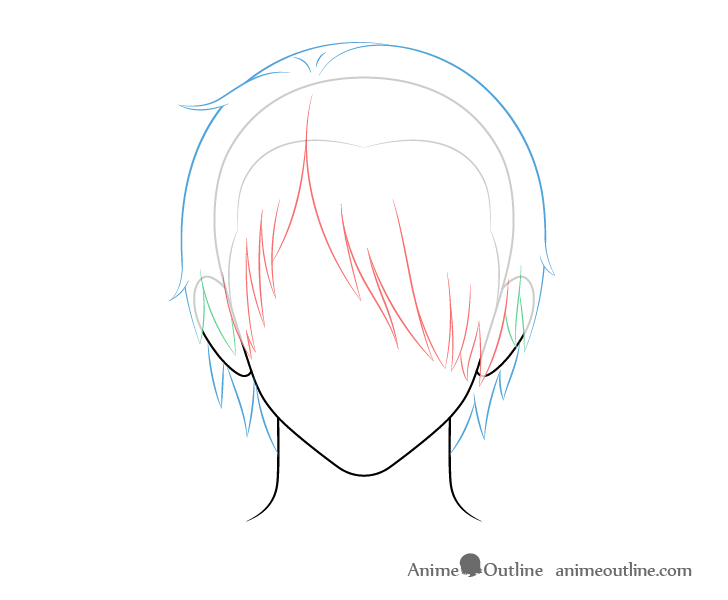
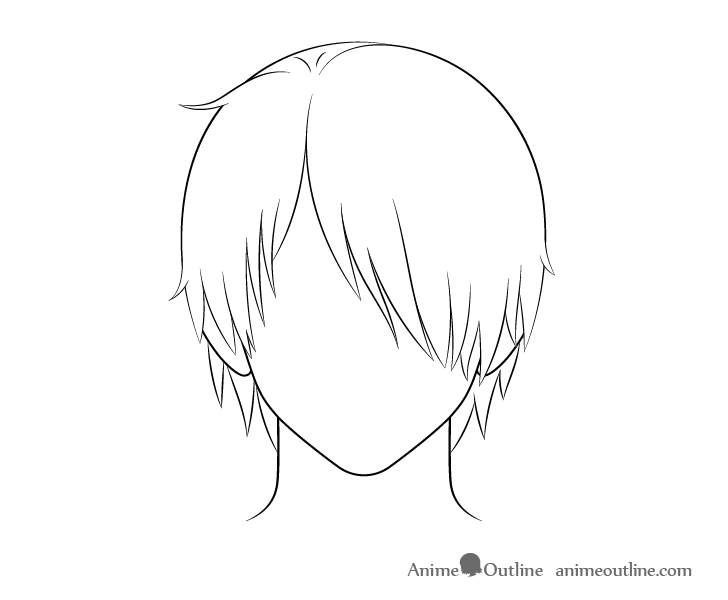
Cartoon Medium Length Male Anime Hair
The medium length hair (or some variation of it) is probably one of the most generic hairstyles in anime and manga. Very mutual to the "average guy" protagonists.
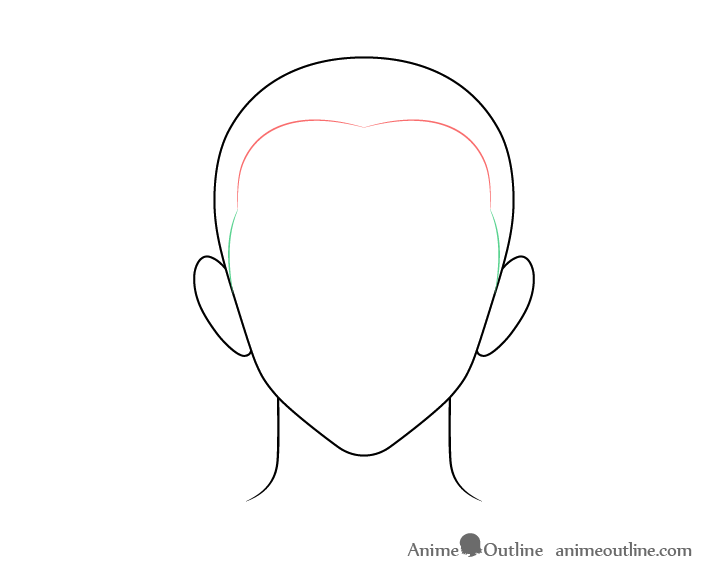
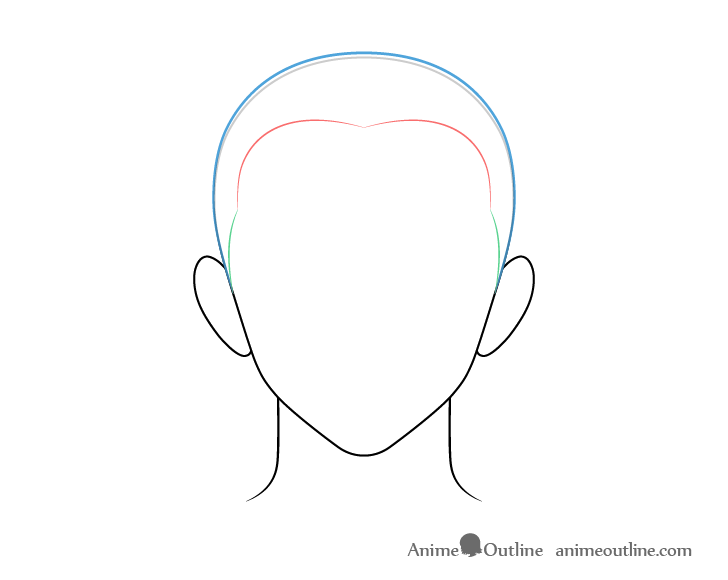
Earlier drawing the hair draw an outline of the head along with the hairline.
Pace ane – Draw the Forepart of the Medium Length Pilus
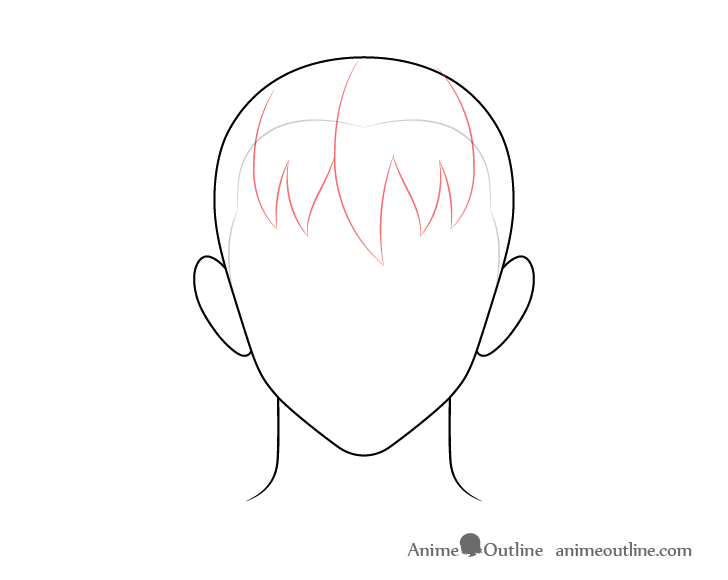
Depict the front of the hair in fairly large clumps that outset from around the top of the head and become down well past the hairline. Make the clump/clumps in the eye slightly longer than the sides.
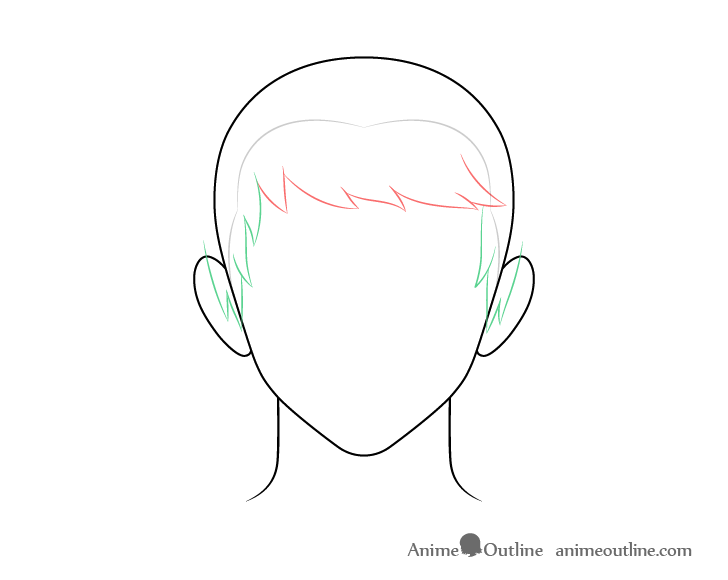
Footstep ii – Depict the Sides of the Medium Length Hair

Add together the side sections with just a few long clumps each over again starting from effectually the top of the caput and going down shut to the bottom of the ears.
Footstep iii – Depict the Top/Back of the Medium Length Hair
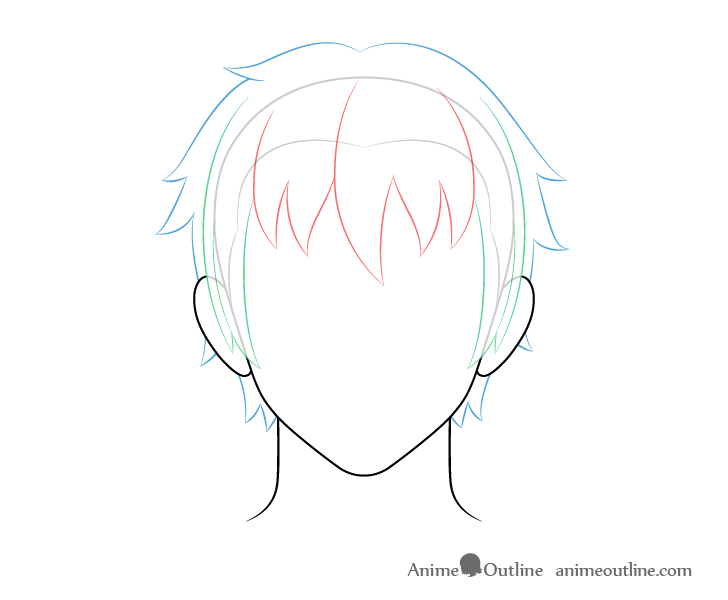
Finally add the top/back section of the hair with a flake of a "roof like" shape on it'southward upper part where the hair slopes down and so transitions into clumps.
You tin as well add some clumps sticking out from below the ears.
Stride 4 – Finish the Line Drawing
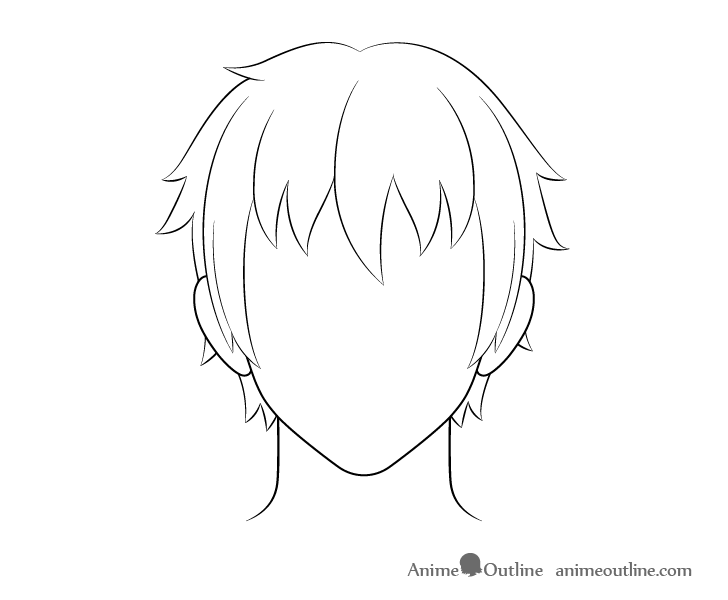
Erase the parts of the hairline and head covered past the hair and go over your cartoon with darker lines.
Stride 5 – Add Some Shading
When washed with the line cartoon y'all can add some basic shading as shown in the example to a higher place.
Cartoon Medium-Long Male Anime Hair
This hairstyle is fairly similar to the previous case merely slightly longer. One common characteristic of this hair is that the portions that would cover the eyes are oft swept to the sides with i big chunk going downwardly the middle of the face up to effectually the tip of the nose.
Start the cartoon with an outline of the head and the hairline.
Step i – Draw the Front end of the Medium Long Hair
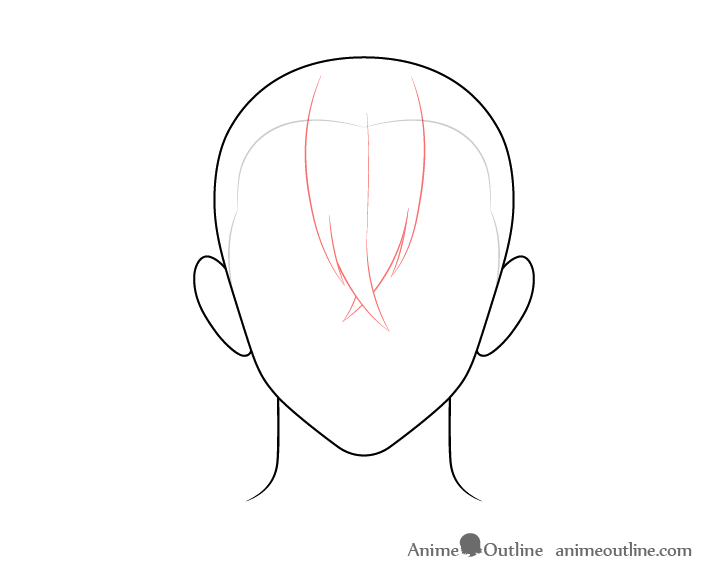
Begin the cartoon of the actual hair by adding the function that goes downward the middle of the face. It can offset from about the superlative of the head and go down to around the tip of the nose (if it was shown). Depict this part equally ii combined clumps that curve in opposite directions forming a bit of an "x" shape almost their lesser as they overlap. You tin can as well draw some small splits into each clump to make the hair look a little more natural.
Stride 2 – Draw the Sides of the Medium Long Hair
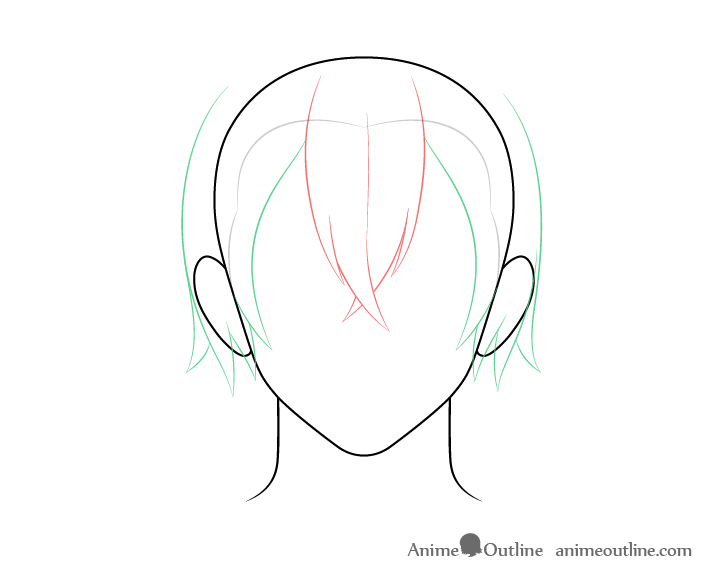
Add the side parts of the hair as two large curved shapes that somewhat "hug" the head and split into smaller clumps towards their ends.
Though really this "side hair" also grabs parts of the front section of the pilus information technology's all the same easier to simply split it up every bit shown in the example.
Footstep 3 – Draw the Summit/Back of the Medium Long Hair

Finally describe the back/top parts of the pilus. To testify that it's adequately long leave a skilful amount of distance between most of the clumps in it's upper part with simply a few shorter clumps sticking out near the very top.
Step 4 – Finish the Line Drawing
Once done with the light line drawing erase the hairline/parts of the head covered by the hair and get over everything with a darker stroke.
Step 5 – Add Some Shading
You tin can besides add some basic shading as shown above.
Drawing Combed Male person Anime Hair

As the title implies this example is of pilus that looks at least partially combed.
Before drawing the hair draw the head and the hairline as shown above.
Step 1 – Draw the Front of the Combed Hair
The front portion of the pilus will be the section that shows that it has been "combed". Position it some altitude below the hairline as the hair will need some length to be combed like this. Describe the "forepart hair" in medium sized clumps that are all sort of "swept" to 1 side. At the same time try and draw each private clump pointing in a slightly different management so that the hair looks more natural.
Step 2 – Depict the Sides of the Combed Hair
To non make the hair look also smashing you can draw the sides slightly messy equally in the above case. If you do want a neater wait you can draw them more like the hair in the "medium length example".
Generally the fewer clumps you draw and the more they point in the same direction the neater the hair or part of the hair will wait. Drawing more clumps pointing in different directions will generally create a messier look.
Step 3 – Depict the Top/Back of the Combed Pilus
Add the back/height portion of the hair in pretty much 2 main curves going from ane side of the acme of the caput. It's overall shape should somewhat hug the caput/confront getting closer to it the more it goes down. You tin can also add a few pocket-sized clumps at the very bottom and slightly above the ears.
Again these clumps will take away simply a little bit from the "corking" look only will make the pilus appear slightly more natural.
Step 4 – Finish the Line Drawing
Erase the hairline and the office of the caput covered by the pilus. Afterwards go over the light line drawing with darker lines.
Step five – Add Some Shading

You can as well utilize some bones shading to the hair to make information technology stand out a little bit more equally shown above.
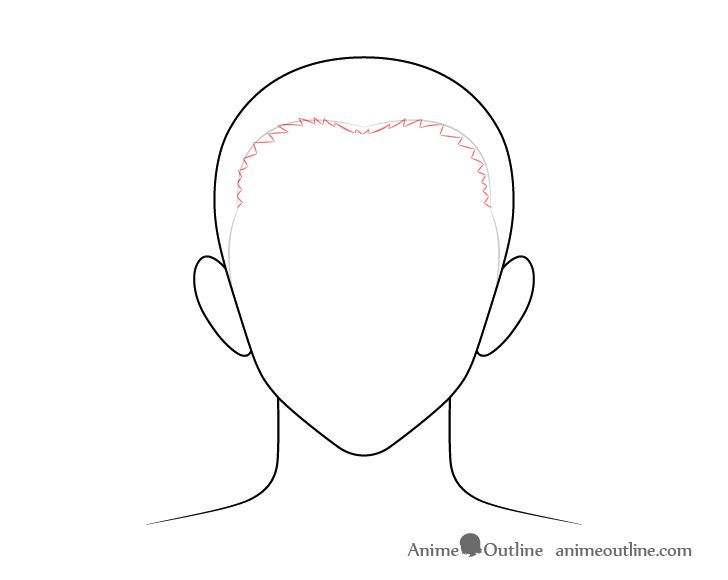
Drawing Combed Back Male Anime Hair
For the combed dorsum pilus the hairline is particularly of import as it's pretty much fully visible.
Brainstorm the drawing by first outlining the shape of the head and placing the hairline.
Stride 1 – Draw the Front of the Combed Back Hair
Depict the front section of the combed back hair as a let of little "teeth like" shapes running forth the hairline. You lot may discover that this is a piddling different from the "buzz cut" where you lot could just utilise the hairline itself as the "front of the hair". The reason for cartoon the "teeth" is because the hair in this example is much longer and these teeth along with the residuum of information technology will help create the look of pulled dorsum hair strands.
Step ii – Depict the Sides of the Combed Back Hair

For the sides of the hair yous can pretty much trace the hairline and connect them to "teeth" of the front section.
Stride iii – Describe the Top/Dorsum of the Combed Dorsum Pilus
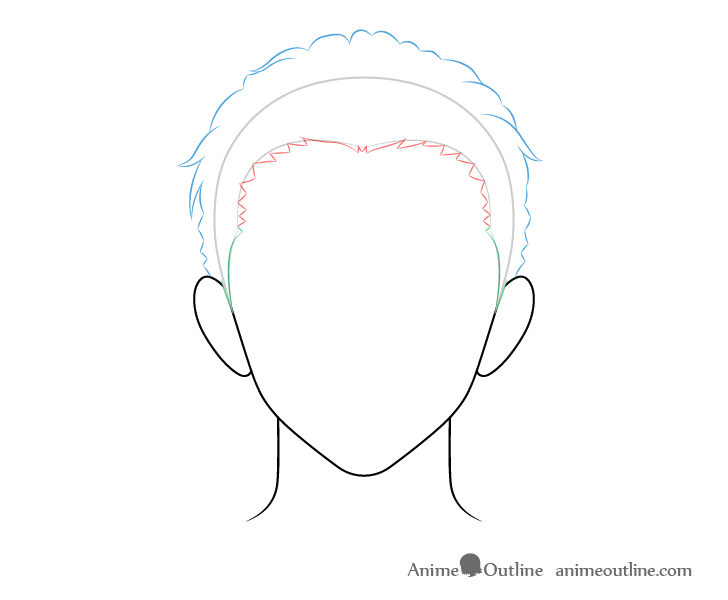
The dorsum/top part in this case is somewhat complex as hair that has been combed back like this will tend to create all kinds of small bumps and clumps.
When drawing these bumps effort to position them in a way where their combined shape withal has a consistent flow to information technology. Meaning that you don't get ane office that is very shut to the caput and ane that really far away from it. There should exist a gradual transition where the bumps and clumps are closer to the head around the ears and farther away from information technology at the summit.
Try and brand the "pilus bumps" effectually the upper surface area of the caput somewhat random in shape with some being much bigger and other being much smaller merely keep the bumps above the ears by and large small.
Draw a few pointy clumps in between the bumps likewise. You can draw near of them with a bit of a "wave".
Footstep four – Finish the Line Drawing
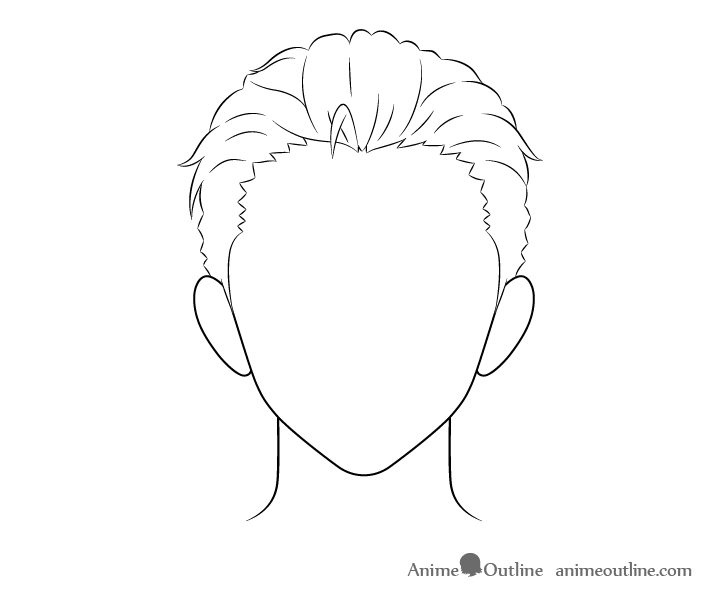
For this step commencement erase the hairline and the part of the head covered by the hair. Next draw in some curved (or wave like) lines in between the hair bumps/clumps of the dorsum/top section and the "teeth" of the front section.
You tin also add a tiny clump of hair (or a pair of clumps) that is hanging downwardly effectually the upper middle of the hairline as shown in the example. Merely erase office of the hairline and add information technology in.
Once you finish the line cartoon go over it with a darker stroke.
Step v – Add Some Shading

Finally yous can add some basic shading to the hair as shown in a higher place.
Cartoon Long Male Anime Hair
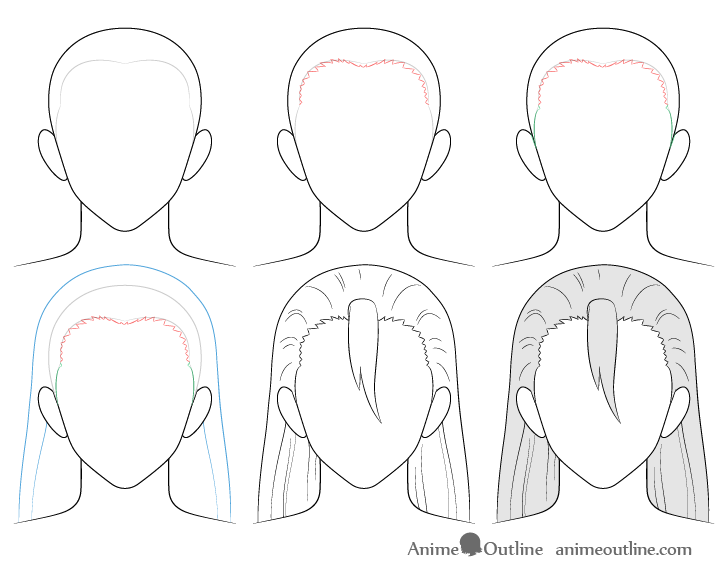
Some long male hairstyles can exist drawn pretty much the same as female. Even so the combed back long hair every bit in this case tends to be mutual to males.
Draw the caput and hairline before starting the hair.
Step 1 – Describe the Forepart of the Long Hair
Like to the previous example of the "combed dorsum pilus" depict piddling "teeth like" shapes along the hairline for it's front section. In this instance the teeth will be just a tiny bit smaller and more numerous than in the previous example.
Pace 2 – Draw the Sides of the Long Hair
Once more similar to the previous example of the "combed back" hair draw the side sections pretty much tracing the hairline and joining up with the "teeth".
Pace 3 – Draw the Top/Back of the Long Hair
Draw the back/top department of the hair pretty much tracing the shape of the upper part of the head some distance away from it. Information technology should then starting to "fan out" more from effectually the top of the ears.
Inside the outline of the back/summit shape draw a pair of lines going from the ears to the shoulders to aid define the book of that office of the hair.
Step four – Finish the Line Drawing
To finish the line drawing of the "long" hairstyle kickoff erase the hairline and the parts of the head covered by the hair. Next you can erase part of the hairline and draw in a large clump of hair hanging downward along the centre of the face. This is optional but it can make the hairstyle look a little more interesting.
Later on draw some curved lines along the superlative and sides of the hair going from the outer shape to the hairline. These will create a hint of the hair strands.
Y'all tin can also draw some wavy lines effectually the inner bottom part of the hair to show the hair folds that usually form in that area.
Step 5 – Add Some Shading
To end y'all tin can add some basic shading as shown in the example above.
Drawing "One Eye Covered" Male Anime Hair
In this style the "balance" of the hair is shifted to one side of the caput roofing one center.
Earlier cartoon the hair first outline the caput and hairline.
Step 1 – Draw the Front end of the "Over One Eye" Hair

Equally can be expected the front section of this hairstyle will be very large and long. You lot tin can retrieve of the unabridged thing equally being split into two main sets of clumps with one beingness smaller and one much larger (covering the eye). Y'all tin can draw the divide in these starting from around the elevation of the head.
Draw the clumps on the "covered side" by and large larger and going down slightly farther (a little below the ear) than those on the open side of the face.
Pace 2 – Depict the Sides of the "Over One Eye" Hair
In that location actually is non much to the "side hair" clumps in this item hairstyle as they are pretty much merged with the front section. Depict them equally sort of extensions of their side of the "front pilus".
Step 3 – Draw the Top/Back of the "Over I Heart" Hair
Draw the back/top part of the hair hugging the head (some distance away from it). You can draw some small clumps into it'south main shape effectually the top and side areas.
Depict the very bottom part of the hair (below the ears) in big and fairly long clumps. This will help give it a slightly more than messy/stuck together look.
Step 4 – Finish the Line Drawing
To finish the line drawing first erase the hairline and parts of the head covered by the hair and later on trace over your drawing with darken lines.
Stride v – Add Some Shading
You can optionally add some very basic shading as shown above.
Drawing "Spiky" Male person Anime Hair
This "spiky" hairstyle is shaped a bit like a flame and may sometimes be used to emphasize a characters "peppery" personality.
Brainstorm the drawing past offset outlining the head and hairline as shown in the offset step to a higher place.
Step 1 – Draw the Forepart of the Spiky Hair
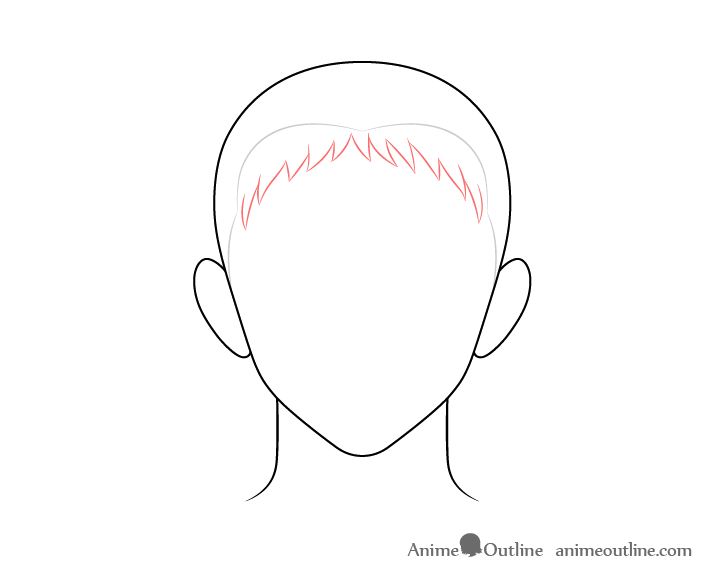
Draw the front department of the hair with adequately minor clumps that beginning effectually the heart tip of the hairline and go downward to the sides.
Step 2 – Draw the Sides of the Spiky Hair
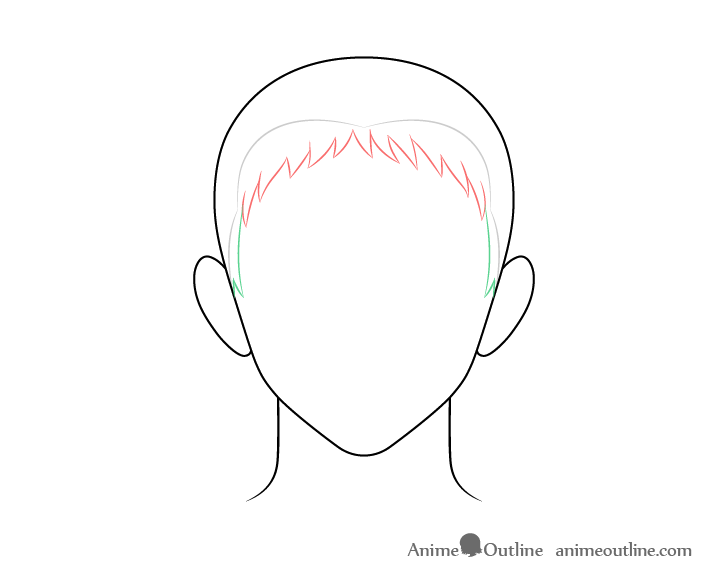
Draw the "side hair" with simply a few tiny clumps.
Footstep three – Depict the Top/Dorsum of the Spiky Hair
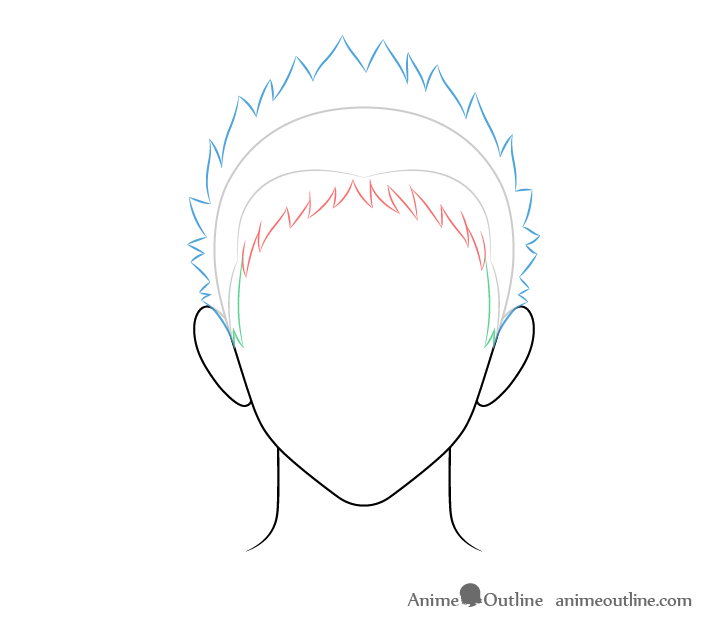
As mentioned before the back/top parts of this hairstyle volition have a combined shape that resembles a flame.
To create the flame shape depict the hair clumps smaller and shorter starting from above the ears and getting by and large larger and longer as they go upwards to the top of the head.
The clumps should also gradually transition away from the head and point more than upward the farther up y'all describe them. At the same time still try and randomize the size and direction of each clump.
Step iv – Finish the Line Drawing
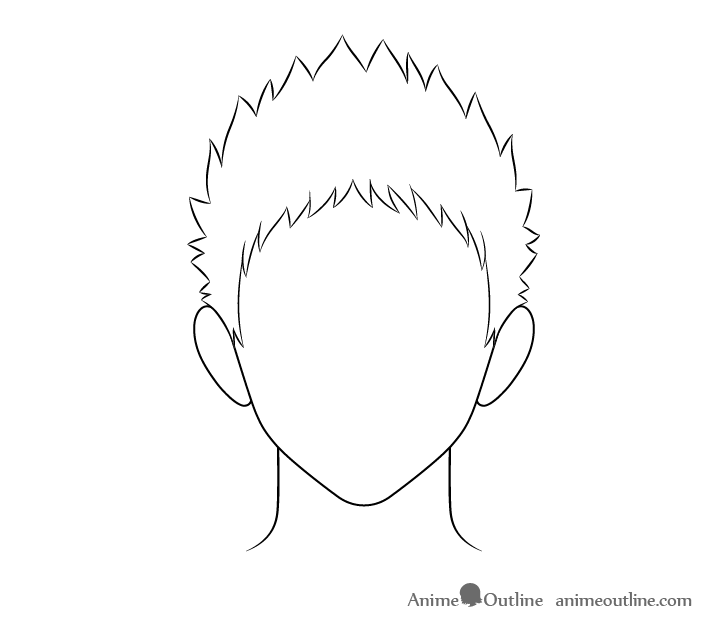
End the line drawing by first erasing the hairline and the part of the head covered by the hair. Later on go over it with darker lines.
Step v – Add Some Shading
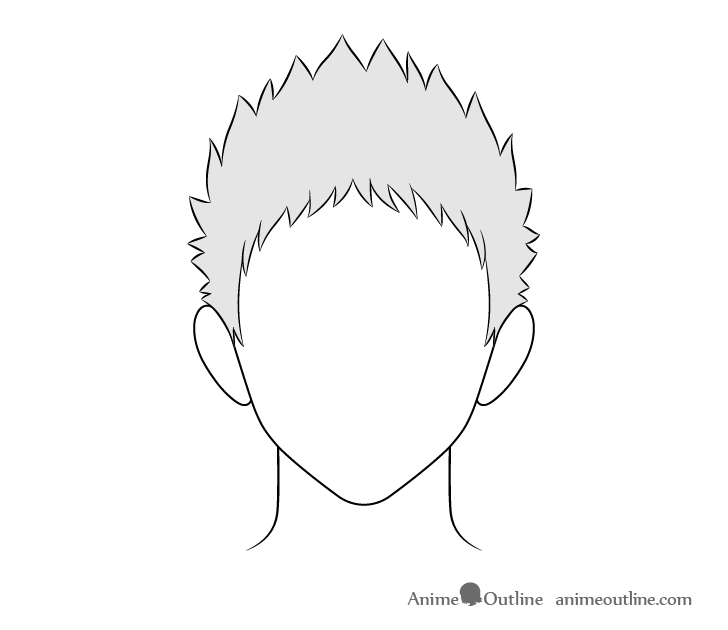
You can likewise add some very simple shading as shown in the example to a higher place.
Conclusion
This tutorial show how to draw some of the more than common male person hairstyles seen in anime and manga. There are of course many more than but it's difficult to embrace besides much in one guide.
For cartoon the faces that can go well with most of these hairstyles run into:
How to Draw Male person Anime Characters Step by Footstep
For drawing female person pilus see:
How to Draw Anime and Manga Hair – Female person
For cartoon facial hair see:
How to Draw Anime Facial Hair – Beards & Mustaches
Source: https://www.animeoutline.com/how-to-draw-anime-male-hair-step-by-step/
Posted by: tolivertione1970.blogspot.com
0 Response to "How To Cut Back Hair Anime Male"
Post a Comment